|
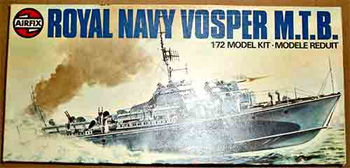
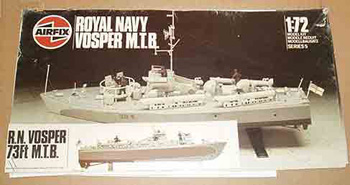
Two incarnations of the box art for the Airfix 1:72 scale Vosper MTB kit
(thoughout this review click the photos for a larger view - allow time for them to load) |
|
Background:
This model depicts a unit of the Vosper Type I. The boats of this type were built from 1943 onward. The type was armed with four eighteen-inch torpedoes, a twin 20mm Oerlikon and optional single .50 caliber machine guns or two single two inch rocket flare projectors mounted on the forward tubes and twin .303 inch Vickers guns mounted on the after tubes. They were powered by three Packard engines that were supercharged, each producing 1,400b.h.p, which gave the boats a maximum speed of 39.9 knots. At a speed of 20 knots, they had an operational range of four hundred seventy miles. All of the Type Is and the follow-on Type IIs were operated in home waters.
The Kit
Of the two Vospers, one being the Revell, the other, this Airfix, on the market, this is the harder one to find. They are of two different types of Vospers, the Revell being an earlier version than the Airfix. Most other reviews claim the Airfix, the more accurate. This is my building experience using this ancient "1/72 scale model construction kit". I have no idea how many times it's been re-released or re-molded, but the flash is there to indicate a few, at the time my kit was done, and mine was done some time ago, judging by the yellowed instruction sheet.
|
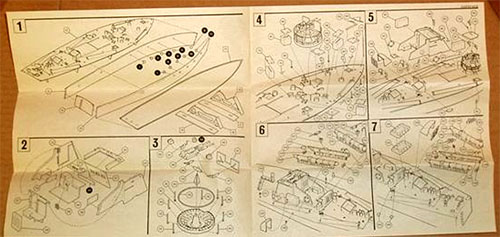
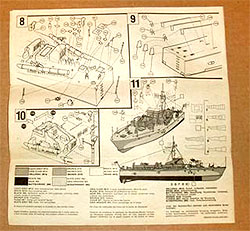
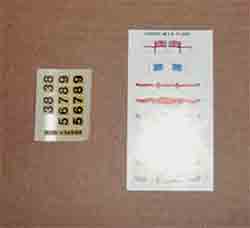
This series of shots show the instruction sheets and
the decal sheet and the flag and signal flags sheet |
|
The Build Up
The instruction sheet is a four page affair, printed in black and white, three languages. The color code is vague calling for a "light grey", "slate grey", bronze, white and black. The painting diagram is just the opposite of what it should be. (A good case for reference material) This same was error was not caught in time by Mr. Connelly's modeler, Mr. Pienkowski as Mr. Connelly alluded to in his previous write up of this kit (available on www.modelingmadness.com) Here's an excerpt:
"The Paint Scheme
The boat was painted as per the instruction sheet because, at that time, I did not know much about MTBs. If I had, I would have caught an error. A rather big and glaring error. The colors of the scheme were reversed. What was supposed to be light gray was instructed to be dark gray and what was supposed to be dark gray was supposed to be painted light gray instead of the other way around. I did not know that! I did not catch that until I was doing the layout for my book on Vosper MTBs two years later. Oh well. I did not feel as bad about it after I had a visit from an English expert on MTBs and he did not notice the error."
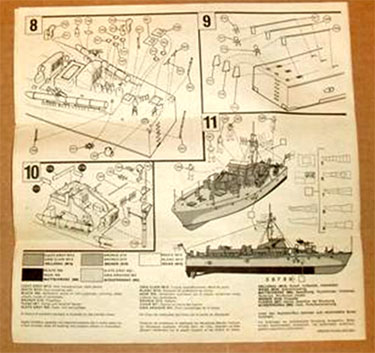
Instructions showing incorrect painting scheme.
Beginning in Step # One, the dual stand, consisting of four parts and the dreaded four piece hull, topped by a deck that only an Airfix fan could love. There are many "raised" areas and "depressions", to indicate the many intakes, exhausts, vent, hatches, gun and torpedo mounts, that have to be attached. The actual fit of the hull and deck pieces, is pretty good, once you get by the balancing act required to join them.
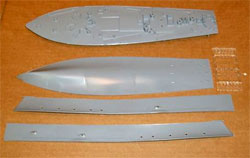
The four-piece hull.
of dotted lines) leave something to be desired at this point. Even after dry-fitting, the fit wasn't what it should be, leaving a small gap in the back. Other than the "light grey" called for on page four, and a black ships wheel, there is no other painting instruction for detailed parts, instruments, etc.
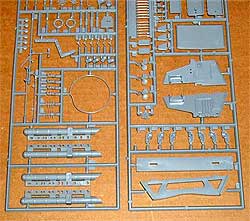
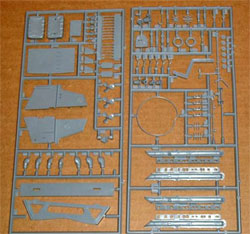
Parts sprues.
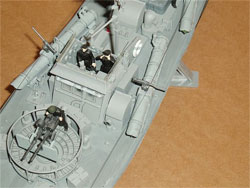
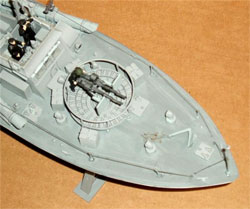
Step # Three, the construction of the adequately detailed, twin 20mm Oerlikon and it's firing base, is another "balancing act", as the guard rail is rather flimsy, consisting of no less than nine uprights, holding a slight ring above the base itself. Best to construct the gun and base as separate pieces, then join them when glue is dry.
Steps # Four - Five, both consist of adding the many, many small parts to the front and mid-deck. Following the exploded view drawings, in the instructions, is a must. Again, save the gun and mount for a later time, to avoid breaking it. Here, flash is the enemy and seam work, the time killer. Big time! Pay close attention to the direction of the intake, exhaust stacks and hatch covers.
Steps # Six - Seven, mainly deal with installation of torpedoes. More major cleanup before assembly, but in this case. perhaps they should be painted separately and installed after other construction. Trial fitting is necessary. The torpedo rack assembly leaves much to be desired.
Step # Eight, more amazingly small parts, in bad need of cleanup, to finish off the top of the rear deck. Keep both the tweezers and sand paper handy!
Step # Nine, the drive shafts, props and rudders. Three of each. Not too bad a cleanup after what you've just been through. Assemble these, then carefully go back and install your main gun and torpedoes. Less to break off that way. your all ready assemble stand will keep the good stuff off the ground, while you finish the rest.
Step # Ten, finishing antennae and clear parts. Straight forward after trim work.
Step # Eleven, rigging, flags, "crew" and wrong "painting instructions.
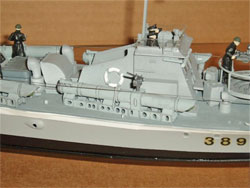
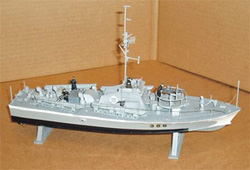
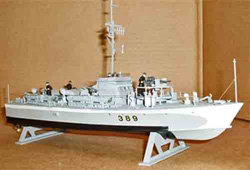
Various shots of the completed model are below.
Summary:
Typical Airfix. That translates into, too many parts, TOO MUCH cleanup and fitting time, not enough (or correct) painting instruction. Those little parts that are molded a fraction off center and must be filed and sanded, rather than cleaning up a seam, before they line up, are a big nuisance and time consumer. Why Airfix will mold something in 2-3 parts, while it could be done in 1, is still a mystery to me. Being primarily an aircraft builder, I know this to be the same with those also. As an aircraft builder, I cannot attest to the accuracy of the kit or its true 1/72 scale, but built up it is a very impressive and nice looking model. A "must have" for any 1/72 boat collection.
|